You need either Visual Studio 6.0 with Service Pack 6 or Visual Studio .Net.
First you have to create a new project and then follow the Installation instructions. After you copied the "jni.h" and "jni_md.h" files and added all the files to your project, you have to add the file "jvm.lib" as library module for the linker. There is a difference between Visual Studio C++ 6.0 and Visual Studio .Net. When you use Visual Studio C++ 6.0 you have to do the following:
-
Select in the "Project" menu the "Settings..." entry.
-
In the dialog choose "Settings for: All Configurations".
-
Go to the "Link" tab.
-
In the field "Object/library modules:" append ' jvm.lib' like in figure 1 (then you have to copy the "jvm.lib" file into your project folder) or ' "{PATH_TO_JVM.LIB}\jvm.lib" like in figure 2.
-
Click the "Ok" button.
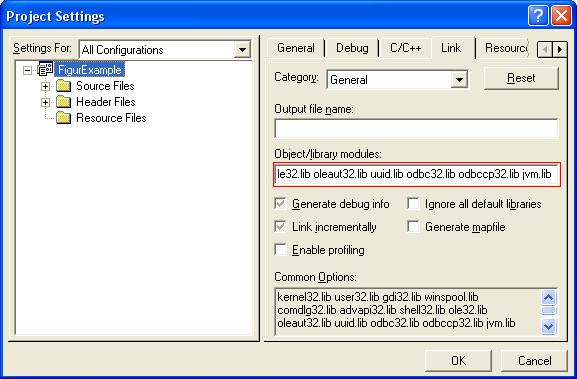
Figure 1: Project Settings

Figure 2: Project Settings
The benefit of version one is that you do not have to change the path in the settings when you are working on computers with different installation directories.
In Visual Studio .Net you only have to add the file "jvm.lib" to the project.
Sometimes Visual Studio .Net will not compile your program and say, that it can't find some functions. Then you schould try to use the option "Not useing Precompiled Headers".
After that you should be able to compile and link your application.
If you get an error when starting the program have a look in the troubleshooting area at When I start the program I get the error: "Cannot find 'jvm.dll'"!.
Generated on Sat Nov 19 14:11:17 2005 for GrubC by
 1.4.4
1.4.4